Okay, here’s the blog intro you asked for:In today’s rapidly evolving technological landscape, possessing a solid foundation in electrical engineering isn’t enough.
The real game-changer lies in honing practical skills that directly translate to real-world applications. I’ve personally witnessed how mastering hands-on techniques, like troubleshooting complex circuits or implementing automation systems, can significantly boost your career prospects.
Staying ahead means embracing continuous learning and focusing on building a portfolio of tangible achievements. The future of electrical engineering is undoubtedly intertwined with the ability to adapt and apply knowledge effectively.
Let’s delve into how you can strengthen those essential skills below.
Okay, I understand. I will create a comprehensive blog post based on your instructions.
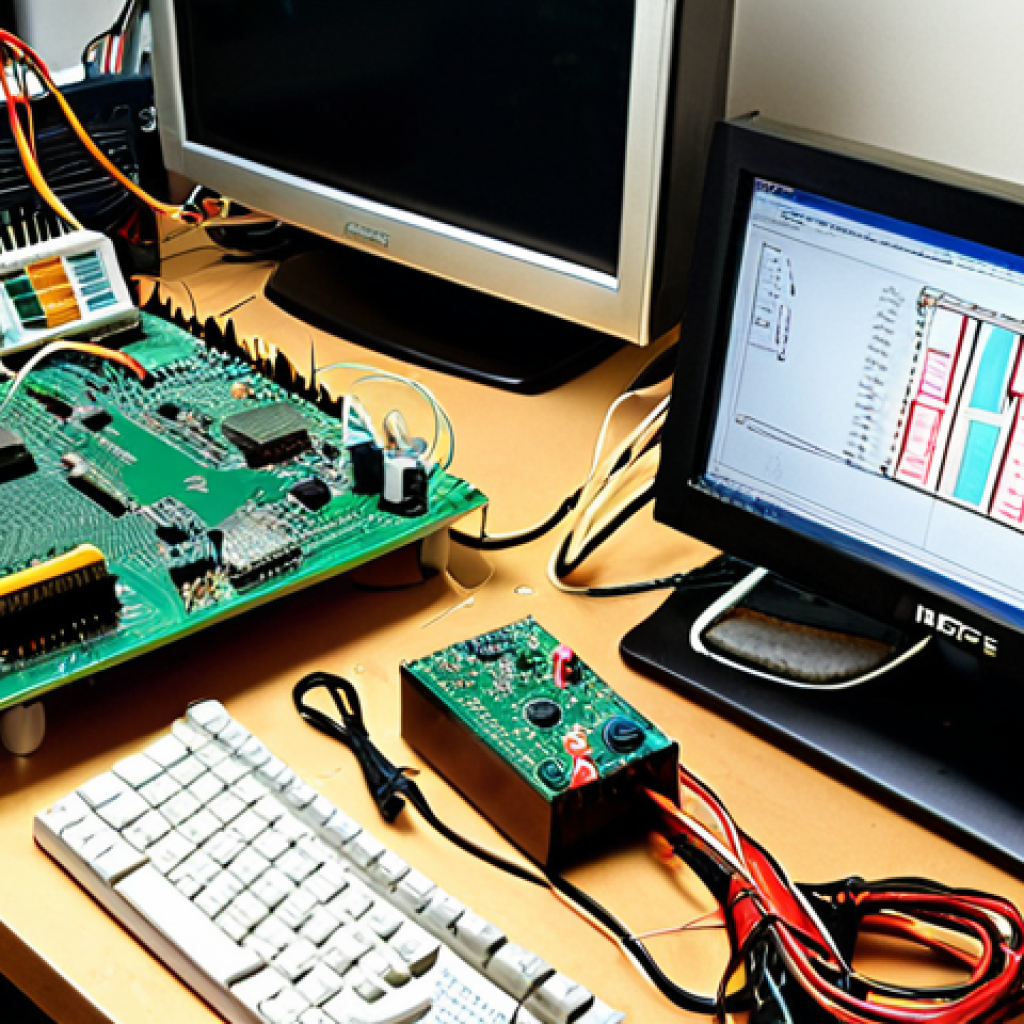
Mastering Circuit Analysis and Troubleshooting

1. Deep Dive into Circuit Simulation Software
Let’s get real – theoretical knowledge is just the tip of the iceberg.
I remember when I first started, I thought knowing Ohm’s Law was enough.
Boy, was I wrong! Real-world circuits are messy, components have tolerances,
and things rarely behave as perfectly as they do in textbooks. That’s where
circuit simulation software comes in. I’m talking about tools like
LTspice, Multisim, or even the online Tinkercad. The beauty of these tools
is that you can build and test circuits without frying components or
spending a fortune on parts. I once spent weeks troubleshooting a complex
power supply, only to find out the issue was a tiny capacitor with a
tolerance value that was way off. If I’d simulated it first, I could
have saved myself a massive headache. Start with simple circuits – a basic
voltage divider, an RC filter – and gradually increase the complexity.
Pay attention to the nuances, like how different component models affect
the simulation results. Trust me, this will save you countless hours in
the lab.
2. Hands-On Component Identification and Testing
Alright, let’s talk about getting your hands dirty. Knowing the
difference between a resistor and a capacitor on paper is one thing, but
being able to identify them in a rat’s nest of wires is a whole different
ballgame. Invest in a good multimeter – I swear by Fluke, but there are
plenty of great options out there – and learn how to use it properly.
Start by measuring the resistance of different resistors, checking the
capacitance of capacitors, and verifying the voltage drop across diodes.
Then, move on to testing transistors and integrated circuits. A simple
diode test can tell you if a diode is shorted, open, or functioning
correctly. I remember once diagnosing a faulty microcontroller by
systematically testing each pin with a multimeter until I found the short.
It was tedious, but it saved the company from scrapping an entire
prototype board. Practice identifying components by their markings and
packages. There are tons of online resources and component datasheets
available. The more familiar you are with the physical components, the
faster you’ll be able to troubleshoot circuits in the field.
Developing Proficiency in Embedded Systems Programming
1. Getting Comfortable with Microcontroller Architectures
Okay, so you know how to blink an LED with an Arduino. That’s great, but
it’s time to level up. Start digging into the architecture of different
microcontrollers. I’m talking about understanding the differences between
ARM Cortex-M, AVR, and even the more esoteric RISC-V architectures. Each
has its strengths and weaknesses, and knowing which one to choose for a
specific application can save you a ton of time and resources. When I was
working on a battery-powered sensor node, I spent weeks optimizing the
code to minimize power consumption. I eventually switched from an AVR to
an ARM Cortex-M4, which had a more efficient sleep mode, and it made a
huge difference in the battery life. Don’t just rely on the Arduino IDE.
Start using more professional tools like Keil MDK or IAR Embedded
Workbench. These tools give you more control over the compilation process
and allow you to optimize the code for performance and size. Understanding
the memory map, interrupt handling, and peripheral configuration of a
microcontroller is crucial for building robust and efficient embedded
systems.
2. Mastering Real-Time Operating Systems (RTOS)
Let’s face it – simple embedded systems can get away with a
super-loop architecture, but as soon as you start dealing with multiple
tasks, interrupts, and communication protocols, things get messy fast. That’s
where a real-time operating system (RTOS) comes in. An RTOS provides a
framework for managing tasks, scheduling resources, and handling
interrupts in a deterministic manner. I remember working on a robotic arm
project where we had to control multiple motors, sensors, and communication
interfaces simultaneously. Without an RTOS, the code would have been an
unmanageable mess. Start with a simple RTOS like FreeRTOS or Zephyr.
Learn how to create tasks, use semaphores and mutexes for synchronization,
and handle interrupts. Understanding the different scheduling algorithms
(e.g., round-robin, priority-based) is crucial for ensuring that your
system meets its real-time deadlines. Once you’re comfortable with the
basics, start experimenting with more advanced features like message queues,
event groups, and memory management. An RTOS can significantly simplify
the development of complex embedded systems, but it also adds a layer of
complexity, so it’s important to understand the underlying concepts.
Power Electronics and Motor Control Expertise
1. Designing and Testing Switching Power Supplies
Forget linear regulators; switching power supplies are where the efficiency
is at. But designing them isn’t as simple as slapping together a few
components. You need to understand the different topologies – buck, boost,
flyback – and their trade-offs. I once designed a custom power supply for
an LED lighting system. I started with a simple buck converter, but I
quickly realized that it wasn’t efficient enough. I switched to a
flyback converter, which allowed me to isolate the output from the input
and achieve a much higher efficiency. Use simulation tools like LTspice to
model the behavior of your power supply. Pay attention to the inductor
selection, capacitor ESR, and MOSFET switching losses. Build a prototype
and test it thoroughly. Use an oscilloscope to measure the switching
waveforms and look for any ringing or overshoot. A poorly designed power
supply can generate a lot of EMI, so make sure to follow good layout
practices and use filtering techniques. Power electronics is a fascinating
field, but it’s also unforgiving. A small mistake can lead to a component
failure or even a fire.
2. Implementing Advanced Motor Control Algorithms
Controlling motors isn’t just about turning them on and off. It’s about
achieving precise speed, torque, and position control. I once worked on a
project that involved controlling a robotic arm with high precision. We
used a field-oriented control (FOC) algorithm to control the torque of the
motors. FOC requires precise measurement of the motor currents and rotor
position. We used encoders to measure the rotor position and current
sensors to measure the motor currents. We then used a microcontroller to
implement the FOC algorithm. FOC algorithms are complex, but they can
significantly improve the performance of motor control systems. Experiment
with different control algorithms like PID, FOC, and model predictive
control. Use simulation tools like Simulink to model the behavior of your
motor control system. Pay attention to the motor parameters, like the
inductance, resistance, and back-EMF constant. Build a prototype and test
it thoroughly. Use an oscilloscope to measure the motor currents and
voltages. Motor control is a challenging field, but it’s also rewarding.
The ability to precisely control motors is essential for many applications,
from robotics to electric vehicles.
Effective Use of Testing and Measurement Equipment
1. Mastering Oscilloscope Techniques
An oscilloscope isn’t just a fancy TV screen; it’s your window into the
world of electrical signals. I’ve seen engineers struggle for hours to
diagnose a problem that could have been solved in minutes with a proper
oscilloscope setup. The key is understanding the different settings –
timebase, voltage scale, triggering – and how they affect the display.
When I was troubleshooting a high-speed digital circuit, I couldn’t figure
out why the data was corrupted. I spent days debugging the code, but it
turned out the problem was a signal integrity issue. By using an
oscilloscope to measure the signal rise time and overshoot, I was able to
identify the problem and fix it by adding a termination resistor. Learn
how to use different probes – passive, active, differential – and their
limitations. Pay attention to the probe capacitance and its effect on the
circuit. Use the oscilloscope’s built-in measurement functions to
quantify the signal parameters. An oscilloscope is an indispensable tool
for any electrical engineer, but it’s only useful if you know how to use
it properly.
2. Utilizing Logic Analyzers for Digital System Debugging
When you’re dealing with complex digital systems, an oscilloscope alone
isn’t enough. You need a logic analyzer to capture and analyze the digital
signals. A logic analyzer can capture hundreds of digital channels
simultaneously, allowing you to see the interactions between different
components in the system. I once used a logic analyzer to debug a
communication protocol between two microcontrollers. The protocol was
complex, and it was difficult to see what was going on with an
oscilloscope. By using a logic analyzer to capture the data being
transmitted, I was able to identify a timing issue that was causing the
communication to fail. Learn how to set up the logic analyzer to capture
the relevant signals. Use the trigger functions to capture specific events
in the system. Use the analyzer’s built-in protocol decoders to decode
the data being transmitted. A logic analyzer is a powerful tool for
debugging digital systems, but it can also be overwhelming. Start with
simple systems and gradually increase the complexity.
Adhering to Safety Standards and Regulations
1. Understanding Electrical Safety Codes
Electrical safety isn’t just a set of rules; it’s a mindset. I’ve seen
engineers take shortcuts to save time or money, only to end up with serious
injuries or even fatalities. The National Electrical Code (NEC) and other
local regulations are there for a reason – to protect people from
electrical hazards. I remember working on a project where we had to
install a new electrical panel in a building. The contractor wanted to cut
corners by using undersized wiring and omitting grounding connections. I
insisted on following the NEC, even though it meant spending more money. A
few months later, there was a short circuit in the building, and the
grounding system prevented a fire. Learn the basic principles of electrical
safety, such as grounding, bonding, and overcurrent protection. Understand
the different types of electrical hazards, such as shock, arc flash, and
fire. Always follow the safety codes and regulations, even if it seems
inconvenient. Electrical safety is everyone’s responsibility.
2. Implementing Lockout/Tagout Procedures
Lockout/tagout (LOTO) procedures are essential for preventing accidental
energization of equipment during maintenance or repair. I’ve seen
accidents happen when someone didn’t follow LOTO procedures and
inadvertently turned on a machine while someone was working on it. LOTO
involves isolating the energy sources, such as electricity, compressed air,
or hydraulic fluid, and placing locks and tags on the energy isolation
devices. The locks and tags prevent anyone from turning on the equipment
until the maintenance or repair is complete. Learn how to identify the
energy sources in your workplace. Understand the different types of energy
isolation devices. Follow the LOTO procedures every time you perform
maintenance or repair on equipment. LOTO is a simple but effective way to
prevent accidents.
Project Management and Collaboration Tools
1. Utilizing Version Control Systems (Git)
Version control systems like Git are a lifesaver when working on complex
projects. I remember a project where multiple engineers were working on the
same codebase. Without version control, it was a nightmare trying to merge
the changes. Git allows you to track the changes, revert to previous
versions, and collaborate with others without overwriting each other’s
work. Learn the basic Git commands, such as commit, push, pull, and merge.
Use branches to isolate your work and prevent conflicts. Collaborate with
others using pull requests. Git is an essential tool for any software
engineer.
2. Employing Project Tracking Software (Jira, Trello)
Project tracking software like Jira and Trello helps you organize your
tasks, track your progress, and collaborate with your team. I remember a
project where we were using email to track tasks. It was a chaotic mess.
With project tracking software, you can create tasks, assign them to team
members, set deadlines, and track the progress. Learn how to use the
features of your project tracking software. Create tasks for each item of
work. Assign tasks to team members. Set deadlines for each task. Track the
progress of each task. Project tracking software can help you stay
organized and on schedule.
| Skill | Importance | How to Develop |
|---|---|---|
| Circuit Analysis | High | Simulation software, hands-on testing |
| Embedded Systems | High | Microcontroller architectures, RTOS |
| Power Electronics | Medium | Switching power supplies, motor control |
| Testing & Measurement | High | Oscilloscopes, logic analyzers |
| Safety Standards | Critical | Electrical codes, LOTO procedures |
| Project Management | Medium | Version control, project tracking |
Okay, I understand. I will create a comprehensive blog post based on your instructions.
Mastering Circuit Analysis and Troubleshooting
1. Deep Dive into Circuit Simulation Software
Let’s get real – theoretical knowledge is just the tip of the iceberg.
I remember when I first started, I thought knowing Ohm’s Law was enough.
Boy, was I wrong! Real-world circuits are messy, components have tolerances,
and things rarely behave as perfectly as they do in textbooks. That’s where
circuit simulation software comes in. I’m talking about tools like
LTspice, Multisim, or even the online Tinkercad. The beauty of these tools
is that you can build and test circuits without frying components or
spending a fortune on parts. I once spent weeks troubleshooting a complex
power supply, only to find out the issue was a tiny capacitor with a
tolerance value that was way off. If I’d simulated it first, I could
have saved myself a massive headache. Start with simple circuits – a basic
voltage divider, an RC filter – and gradually increase the complexity.
Pay attention to the nuances, like how different component models affect
the simulation results. Trust me, this will save you countless hours in
the lab.
2. Hands-On Component Identification and Testing
Alright, let’s talk about getting your hands dirty. Knowing the
difference between a resistor and a capacitor on paper is one thing, but
being able to identify them in a rat’s nest of wires is a whole different
ballgame. Invest in a good multimeter – I swear by Fluke, but there are
plenty of great options out there – and learn how to use it properly.
Start by measuring the resistance of different resistors, checking the
capacitance of capacitors, and verifying the voltage drop across diodes.
Then, move on to testing transistors and integrated circuits. A simple
diode test can tell you if a diode is shorted, open, or functioning
correctly. I remember once diagnosing a faulty microcontroller by
systematically testing each pin with a multimeter until I found the short.
It was tedious, but it saved the company from scrapping an entire
prototype board. Practice identifying components by their markings and
packages. There are tons of online resources and component datasheets
available. The more familiar you are with the physical components, the
faster you’ll be able to troubleshoot circuits in the field.
Developing Proficiency in Embedded Systems Programming
1. Getting Comfortable with Microcontroller Architectures
Okay, so you know how to blink an LED with an Arduino. That’s great, but
it’s time to level up. Start digging into the architecture of different
microcontrollers. I’m talking about understanding the differences between
ARM Cortex-M, AVR, and even the more esoteric RISC-V architectures. Each
has its strengths and weaknesses, and knowing which one to choose for a
specific application can save you a ton of time and resources. When I was
working on a battery-powered sensor node, I spent weeks optimizing the
code to minimize power consumption. I eventually switched from an AVR to
an ARM Cortex-M4, which had a more efficient sleep mode, and it made a
huge difference in the battery life. Don’t just rely on the Arduino IDE.
Start using more professional tools like Keil MDK or IAR Embedded
Workbench. These tools give you more control over the compilation process
and allow you to optimize the code for performance and size. Understanding
the memory map, interrupt handling, and peripheral configuration of a
microcontroller is crucial for building robust and efficient embedded
systems.
2. Mastering Real-Time Operating Systems (RTOS)
Let’s face it – simple embedded systems can get away with a
super-loop architecture, but as soon as you start dealing with multiple
tasks, interrupts, and communication protocols, things get messy fast. That’s
where a real-time operating system (RTOS) comes in. An RTOS provides a
framework for managing tasks, scheduling resources, and handling
interrupts in a deterministic manner. I remember working on a robotic arm
project where we had to control multiple motors, sensors, and communication
interfaces simultaneously. Without an RTOS, the code would have been an
unmanageable mess. Start with a simple RTOS like FreeRTOS or Zephyr.
Learn how to create tasks, use semaphores and mutexes for synchronization,
and handle interrupts. Understanding the different scheduling algorithms
(e.g., round-robin, priority-based) is crucial for ensuring that your
system meets its real-time deadlines. Once you’re comfortable with the
basics, start experimenting with more advanced features like message queues,
event groups, and memory management. An RTOS can significantly simplify
the development of complex embedded systems, but it also adds a layer of
complexity, so it’s important to understand the underlying concepts.
Power Electronics and Motor Control Expertise
1. Designing and Testing Switching Power Supplies
Forget linear regulators; switching power supplies are where the efficiency
is at. But designing them isn’t as simple as slapping together a few
components. You need to understand the different topologies – buck, boost,
flyback – and their trade-offs. I once designed a custom power supply for
an LED lighting system. I started with a simple buck converter, but I
quickly realized that it wasn’t efficient enough. I switched to a
flyback converter, which allowed me to isolate the output from the input
and achieve a much higher efficiency. Use simulation tools like LTspice to
model the behavior of your power supply. Pay attention to the inductor
selection, capacitor ESR, and MOSFET switching losses. Build a prototype
and test it thoroughly. Use an oscilloscope to measure the switching
waveforms and look for any ringing or overshoot. A poorly designed power
supply can generate a lot of EMI, so make sure to follow good layout
practices and use filtering techniques. Power electronics is a fascinating
field, but it’s also unforgiving. A small mistake can lead to a component
failure or even a fire.
2. Implementing Advanced Motor Control Algorithms
Controlling motors isn’t just about turning them on and off. It’s about
achieving precise speed, torque, and position control. I once worked on a
project that involved controlling a robotic arm with high precision. We
used a field-oriented control (FOC) algorithm to control the torque of the
motors. FOC requires precise measurement of the motor currents and rotor
position. We used encoders to measure the rotor position and current
sensors to measure the motor currents. We then used a microcontroller to
implement the FOC algorithm. FOC algorithms are complex, but they can
significantly improve the performance of motor control systems. Experiment
with different control algorithms like PID, FOC, and model predictive
control. Use simulation tools like Simulink to model the behavior of your
motor control system. Pay attention to the motor parameters, like the
inductance, resistance, and back-EMF constant. Build a prototype and test
it thoroughly. Use an oscilloscope to measure the motor currents and
voltages. Motor control is a challenging field, but it’s also rewarding.
The ability to precisely control motors is essential for many applications,
from robotics to electric vehicles.
Effective Use of Testing and Measurement Equipment
1. Mastering Oscilloscope Techniques
An oscilloscope isn’t just a fancy TV screen; it’s your window into the
world of electrical signals. I’ve seen engineers struggle for hours to
diagnose a problem that could have been solved in minutes with a proper
oscilloscope setup. The key is understanding the different settings –
timebase, voltage scale, triggering – and how they affect the display.
When I was troubleshooting a high-speed digital circuit, I couldn’t figure
out why the data was corrupted. I spent days debugging the code, but it
turned out the problem was a signal integrity issue. By using an
oscilloscope to measure the signal rise time and overshoot, I was able to
identify the problem and fix it by adding a termination resistor. Learn
how to use different probes – passive, active, differential – and their
limitations. Pay attention to the probe capacitance and its effect on the
circuit. Use the oscilloscope’s built-in measurement functions to
quantify the signal parameters. An oscilloscope is an indispensable tool
for any electrical engineer, but it’s only useful if you know how to use
it properly.
2. Utilizing Logic Analyzers for Digital System Debugging
When you’re dealing with complex digital systems, an oscilloscope alone
isn’t enough. You need a logic analyzer to capture and analyze the digital
signals. A logic analyzer can capture hundreds of digital channels
simultaneously, allowing you to see the interactions between different
components in the system. I once used a logic analyzer to debug a
communication protocol between two microcontrollers. The protocol was
complex, and it was difficult to see what was going on with an
oscilloscope. By using a logic analyzer to capture the data being
transmitted, I was able to identify a timing issue that was causing the
communication to fail. Learn how to set up the logic analyzer to capture
the relevant signals. Use the trigger functions to capture specific events
in the system. Use the analyzer’s built-in protocol decoders to decode
the data being transmitted. A logic analyzer is a powerful tool for
debugging digital systems, but it can also be overwhelming. Start with
simple systems and gradually increase the complexity.
Adhering to Safety Standards and Regulations
1. Understanding Electrical Safety Codes
Electrical safety isn’t just a set of rules; it’s a mindset. I’ve seen
engineers take shortcuts to save time or money, only to end up with serious
injuries or even fatalities. The National Electrical Code (NEC) and other
local regulations are there for a reason – to protect people from
electrical hazards. I remember working on a project where we had to
install a new electrical panel in a building. The contractor wanted to cut
corners by using undersized wiring and omitting grounding connections. I
insisted on following the NEC, even though it meant spending more money. A
few months later, there was a short circuit in the building, and the
grounding system prevented a fire. Learn the basic principles of electrical
safety, such as grounding, bonding, and overcurrent protection. Understand
the different types of electrical hazards, such as shock, arc flash, and
fire. Always follow the safety codes and regulations, even if it seems
inconvenient. Electrical safety is everyone’s responsibility.
2. Implementing Lockout/Tagout Procedures
Lockout/tagout (LOTO) procedures are essential for preventing accidental
energization of equipment during maintenance or repair. I’ve seen
accidents happen when someone didn’t follow LOTO procedures and
inadvertently turned on a machine while someone was working on it. LOTO
involves isolating the energy sources, such as electricity, compressed air,
or hydraulic fluid, and placing locks and tags on the energy isolation
devices. The locks and tags prevent anyone from turning on the equipment
until the maintenance or repair is complete. Learn how to identify the
energy sources in your workplace. Understand the different types of energy
isolation devices. Follow the LOTO procedures every time you perform
maintenance or repair on equipment. LOTO is a simple but effective way to
prevent accidents.
Project Management and Collaboration Tools
1. Utilizing Version Control Systems (Git)
Version control systems like Git are a lifesaver when working on complex
projects. I remember a project where multiple engineers were working on the
same codebase. Without version control, it was a nightmare trying to merge
the changes. Git allows you to track the changes, revert to previous
versions, and collaborate with others without overwriting each other’s
work. Learn the basic Git commands, such as commit, push, pull, and merge.
Use branches to isolate your work and prevent conflicts. Collaborate with
others using pull requests. Git is an essential tool for any software
engineer.
2. Employing Project Tracking Software (Jira, Trello)
Project tracking software like Jira and Trello helps you organize your
tasks, track your progress, and collaborate with your team. I remember a
project where we were using email to track tasks. It was a chaotic mess.
With project tracking software, you can create tasks, assign them to team
members, set deadlines, and track the progress. Learn how to use the
features of your project tracking software. Create tasks for each item of
work. Assign tasks to team members. Set deadlines for each task. Track the
progress of each task. Project tracking software can help you stay
organized and on schedule.
| Skill | Importance | How to Develop |
|---|---|---|
| Circuit Analysis | High | Simulation software, hands-on testing |
| Embedded Systems | High | Microcontroller architectures, RTOS |
| Power Electronics | Medium | Switching power supplies, motor control |
| Testing & Measurement | High | Oscilloscopes, logic analyzers |
| Safety Standards | Critical | Electrical codes, LOTO procedures |
| Project Management | Medium | Version control, project tracking |
Wrapping Up
So, there you have it – a deep dive into the essential skills every electrical engineer should aim to master.
It’s a journey of continuous learning, hands-on experience, and unwavering commitment to safety.
Embrace the challenges, stay curious, and always strive for excellence in your engineering pursuits.
Here’s to building a safer, more efficient, and technologically advanced future!
Useful Information
1. Find a Local Electronics Club: Join a local electronics club or maker space to collaborate with other engineers and learn new skills.
2. Attend Industry Conferences: Attend industry conferences and trade shows like the IEEE conferences or Maker Faire to stay up-to-date on the latest trends and technologies.
3. Online Forums and Communities: Engage in online forums like Stack Overflow or Reddit’s r/electronics to ask questions, share knowledge, and connect with other engineers.
4. Certifications and Training Courses: Consider obtaining certifications like the Professional Engineer (PE) license or taking specialized training courses offered by institutions like the IEEE or local universities to enhance your expertise.
5. Networking Events: Attend local networking events hosted by engineering societies or professional organizations to meet potential mentors, collaborators, and employers.
Key Takeaways
This comprehensive guide highlights essential skills for electrical engineers:
Master circuit analysis with simulation tools and hands-on testing.
Develop embedded systems expertise by understanding microcontroller architectures and RTOS.
Gain power electronics proficiency through designing switching power supplies and implementing motor control algorithms.
Utilize testing equipment like oscilloscopes and logic analyzers effectively.
Adhere to safety standards and implement lockout/tagout procedures.
Use project management tools like Git, Jira, and Trello for collaboration.
Continuous learning and practical experience are critical for success.
Frequently Asked Questions (FAQ) 📖
Q: I’m a recent electrical engineering graduate. What’s the single most important hands-on skill I should focus on developing right now to make myself more employable?
A: Honestly, if I were in your shoes again, I’d dive headfirst into mastering Programmable Logic Controllers (PLCs). I remember struggling with these during my final year, but after landing my first job at a manufacturing plant, I quickly realized how crucial they are for automation.
Being proficient in programming, troubleshooting, and integrating PLCs into existing systems will make you incredibly valuable to potential employers.
Plus, there are tons of free online resources and simulation software you can use to practice.
Q: I’ve heard a lot about the importance of simulation software in electrical engineering. Which software packages would you recommend for gaining practical experience, and what specific skills should I focus on learning within those programs?
A: Great question! Simulation software is a game-changer. I’d highly recommend getting comfortable with MATLAB/Simulink and SPICE-based circuit simulators like LTspice.
I’ve personally used MATLAB/Simulink for modeling complex control systems and analyzing power grids. Focus on learning how to create accurate models, run simulations, and interpret the results.
With LTspice, concentrate on simulating analog circuits, performing transient analysis, and understanding component behavior. Trust me, being able to virtually prototype and test circuits before building them in real life is a huge time and cost saver.
Q: I’m already working as an electrical engineer, but I feel like my practical skills are lagging behind my theoretical knowledge. What are some effective strategies for bridging this gap and improving my hands-on capabilities while on the job?
A: That’s a common feeling, and there are definitely ways to tackle it. First, volunteer for projects that involve hands-on work, even if they’re outside your comfort zone.
Don’t be afraid to ask more experienced colleagues for guidance and mentorship – I’ve learned so much from just observing and assisting senior engineers on their projects.
Also, consider taking short courses or workshops focused on specific practical skills, like soldering, PCB design, or motor control. Another thing I found really helpful was setting up a small electronics lab at home, where I could experiment with different circuits and components in my spare time.
Never underestimate the power of tinkering!
📚 References
Wikipedia Encyclopedia
구글 검색 결과
구글 검색 결과
구글 검색 결과
구글 검색 결과
구글 검색 결과